Australia v New Zealand, 2nd ODI - Australia Player Ratings
5 Min Read

Coming to the Manuka Oval, New Zealand were eager to win the second ODI and level the Chappell-Hadlee Trophy. Kane Williamson won the toss and was certain they wanted to chase this time. It started on an ominous note for them as the opening pair of David Warner and Aaron Finch got Australia off to a good start.
If it was Steve Smith who ran away with the batting inning in the last ODI it was Warner today and with some quick-fire knocks from the Travis Head and Mitchell Marsh, they managed to score 378/5 in their 50 overs. New Zealand in their chase never matched up with the asking rate and though a couple of their batsmen scored fifties the chase was never on. They eventually lost the match by 116 runs and along with that conceded the series with a game to go.
David Warner 9/10:
David Warner more than made up for missing out on making it count in the last match after getting a start. He was absolutely brilliant from the word go today, playing his natural shots all around the ground. The fact that Canberra wicket was as flat as it could get with the ball coming onto the bat nicely helped his vigil in the middle. Warner got to his fifty as well as century at run-a-ball pace and as he would have wanted to explode after getting into triple figures was dismissed by Colin de Grandhomme for 119 off 115 balls. He hit a total of 14 boundaries and a six.
Aaron Finch 3/10:
Aaron Finch would have wanted to score big in this inning to rub off the golden duck of the first game and though he took a while to get going here looked pretty certain of what he was doing thus good enough to get a big score. Finch stood at the other end while Warner did most of the scoring. In the brief inning, he was dropped once and after the pacers failed to get him a breakthrough skipper Kane Williamson turned to left-arm spinner Mitchell Santner and he struck immediately. Finch went for the sweep shot but the ball wasn’t there for it and he was bowled from behind his legs.
Steve Smith 7/10:
The skipper played a sizzling knock in the last ODI and carried on from where he left at the SCG. With Warner going well at the other end, the Smith played the second fiddle. They had a 145-run partnership together after Warner was dismissed Smith took the initiative himself and didn’t let the run rate drop. He had another partnership with Travis Head and as he looked quite set for another ton but played a foul shot on a Tim Southee delivery and the ball lobbed in the air to Mitchell Santner. Smith scored 72 off 76 with six boundaries and a six.
Travis Head 7/10:
It was an extended opportunity for Travis Head in the first ODI and he made the most of it. A half century ensured he held his place in the XI and here he was once again batting with the skipper and was expected to push the run rate up. Head started playing his shots from the onset and plundered the New Zealand bowlers all around the park. He scored his second half century of the series but was soon dismissed on 57. He took just 32 balls to score the runs and was aided by six boundaries and a couple of sixes.
Mitchell Marsh 8/10:
Mitchell Marsh was unlucky with the bat in the last match but he was more than willing to turn things around here. He played a very aggressive knock and along with Head and Matthew Wade took the Australian team total well over 350. Marsh stayed at the crease for 40 balls and scored 76 runs. He hit some brutal shots towards the end of the innings and deposited 7 balls in the Manuka Oval stands while hitting just two fours. In the end, it was his knock that proved to be the difference between a 300 total and 378 that they managed in 50 overs.
Matthew Wade 4/10:
Matthew Wade had to swing his bat around from the very first ball this time. He walked in to bat with just three overs to play and Marsh going at full throttle at the other end. Wade also hit a four and a six during his 5-ball stay at the crease, he scored 11 runs but was clean bowled by Trent Boult; there was nothing much he could do about it.
George Bailey 0.5:
Back to back dull games for George Bailey. After scoring just 17 in the first match here couldn’t add a single run today. He walked out to bat towards the end of the inning and when it mattered the most he played 6 balls but couldn’t score anything. He had his chances on the field where he dropped a tough one and later took a catch and that was all his contribution in the game.
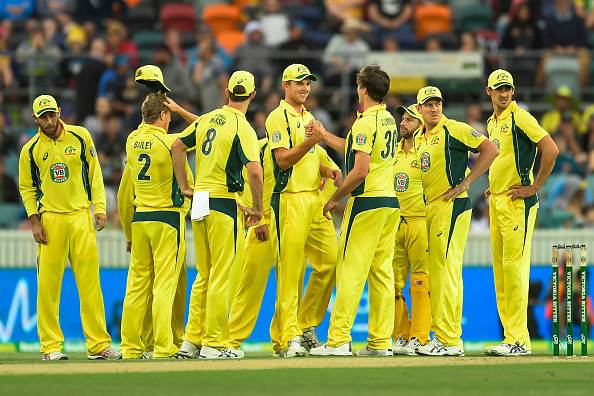
Pat Cummins 7/10:
On a wicket that had little for the bowlers Pat Cummins bowled superbly. He was express with his pace and constantly challenged the batsmen. Cummins held good lines and that earned him the rewards. He was the pick of the bowlers for Australia with 4 wickets in his 10 overs. He also accounted for the big man Martin Guptill who was just starting to cut loose. Kane Williamson, Tim Southee and Matt Henry were his other scalps. With figures of 10-0-41-4, Cummins was the most economical bowler and has certainly enhanced his reputation.
Mitchell Starc 5/10:
While most of the New Zealand bowlers were expensive the Australian pacers were on the money. It remained a good surface for batting but, some smart bowling and execution helped the hosts keep complete control at all times. Mitchell Starc couldn’t strike in his first spell but came back well towards the end of the inning to grab a couple of wickets. He was bowling quick and on target as well.
James Faulkner 5/10:
The Australian team management decided to drop Adam Zampa and add another pacer to the attack for this game. James Faulkner who is also a more than handy man with the bat though wasn’t required to bat in the game bowled fairly well accounting for two wickets. He dismissed the danger man Colin Munro and wicketkeeper-batsman BJ Watling. In comparison to the other bowlers despite his variations, Faulkner was expensive on the night.
Josh Hazlewood 5/10:
Josh Hazlewood might not be as quick as the other bowlers in the Australian bowling lineup but knows his strengths, understands his game really well and is an intelligent bowler. He assesses the weakness of the opposition batsmen and exploits it really well. He drew first blood with the wicket of Tom Latham and in his second spell dismissed Neesham just when he was looking to up the ante.
Get every cricket updates! Follow Us:
Download Our App