Australia v New Zealand 2nd ODI - 5 Talking Points
4 Min Read


It was yet another thoroughly professional performance by Australia as they gained an unassailable 2-0 lead in the 3-match Chappell-Hadlee Trophy beating New Zealand quite comprehensively by 116 runs at the Manuka Oval in Canberra on Tuesday.
Kane Williamson’s decision to field came as a surprise to many as the visitors were plundered all around Canberra. Openers David Warner and Aaron Finch provided the ideal start with a 68-run partnership for the opening wicket. Captain Steve Smith who scored a career-best 164 in the opening ODI carried on from where he left in Sydney. The duo shared a 145-run partnership for the 2nd wicket.
Travis Head and Mitchell Marsh pressed on the accelerator during the later stages of the innings as Australia posted a mammoth 378/5 in their allotted 50 overs. The visitors began well with the 3rd wicket partnership between Jimmy Neesham and captain Kane Williamson going great guns but with the fall of Neesham’s wicket, New Zealand fell apart and despite Williamson’s valiant effort, the visitors fell short of the Australian total by a massive margin of 116 runs.
With the series done and dusted as far as Australia is concerned, we give a look at 5 talking points from the 2nd ODI at Canberra.
1. David Warner’s brilliant century:
One of the most destructive batsmen of the modern generation, David Warner played a terrific innings and was instrumental in Australia posting such a mammoth total. The southpaw began cautiously and stitched together a 68-run partnership with Aaron Finch for the opening wicket. Captain Steve Smith joined Warner in the middle after the fall of Finch’s wicket and the skipper carried on from where he left in the 1st ODI.
Warner was rotating the strike on a regular basis and finding the gaps whenever necessary. Though it was not one of the typical David Warner innings but it was as important considering the context of the game. The hard-hitting southpaw struck 14 fours and a solitary six en route to his century and by the time he was dismissed he had already taken his team’s score to 213/2 in 36 overs.
2. Travis Head and Mitchell Marsh’s heroics in the later stages of the innings
Head came at the crease at the fall of Warner’s wicket. The free flowing left-hander began on a positive note and started finding the gaps on a regular basis. He struck six fours and two sixes en route to his 32 balls 57. The left hander’s brilliant showing in the series will make Maxwell’s life of making a comeback that more difficult. Head was eventually dismissed on 57 by Mitchell Santner.
All-rounder Mitchell Marsh joined Head in the middle following Smith’s dismissal and the duo kept smashing the listless bowlers all over the park. They shared a 71-run partnership in 6 overs to set up the platform for a mammoth score. Despite the fall of Head’s wicket, Marsh continued his good showing and went berserk especially in the death overs. The swashbuckling all-rounder struck as many as seven sixes and two fours during his unbeaten innings of 76 of 40 balls.
3. Mitchell Santner’s impressive spell when rest around him went for plenty:
Mitchell Santner was the only bright spot in New Zealand’s bowling department in the 2nd ODI where they were plundered for 378/5 in 50 overs. Santner was brought into the attack by Kane Williamson as the 1st change bowler and he kept on bowling in the right areas. Santner was rewarded with his first wicket when he breached Aaron Finch’s defense and castled the hard hitting opener.
The left-arm orthodox spinner was pretty impressive and though he had only one wicket to show for his efforts, his spell prevented the hosts from scoring somewhere in excess of 400. Santner eventually finished with figures of 1/47 in his allotted 10 overs and was the only bowler who looked like troubling the opposition batsmen.
4. Jimmy Neesham and Kane Williamson’s impressive show with the bat:
Chasing a mammoth 379 to win, New Zealand lost their first two wickets pretty cheaply. Jimmy Neesham joined his captain Kane Williamson in the middle and the duo started finding the gaps on a consistent basis. Neesham and Williamson both scored at a brisk pace as for the first time the Aussies looked in some sort of a pressure.
Neesham who was impressive in the 1st ODI too struck 7 fours and a solitary six during his innings of 74 of 83 balls. Williamson who tried to play the sheet anchor’s role kept on losing partners at the other end and eventually gave away his wicket going for a big shot. The target was massive and despite Williamson and Neesham’s heroics, the visitors were shot out for 262.
5. Pat Cummins’ superb spell
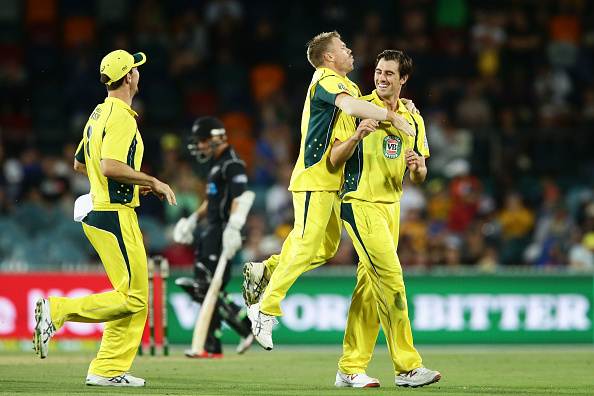
Pat Cummins who made his comeback in the opening ODI at Sydney bowled his heart out and returned with impressive figures of 4/41 in his 10 overs. Cummins hurries the batsman with his brisk pace removed the centurion from the previous match, Martin Guptill pretty cheaply. He kept on moving the ball away from the batsman and suddenly unsettled him with an inswinger. It was a great exhibition of fast bowling by a bowler who has suffered a lot in his career due to injuries.
Cummins returned very strongly in his 2nd spell removing Tim Southee and Matt Henry in quick succession and finished off his quota with the wicket of dangerman Kane Williamson. The quickie must be pretty proud of the way he made a comeback in the Australian squad and would hope to continue his good form in the final ODI too.
Download Our App